


PROGRAMMARE UNA FPGA SENZA CONOSCERE VERILOG o VHDL
L'FPGA (Field Programmable Gate Array) é un circuito integrato programmabile che offre soluzioni non possibili con microcontrollori o DSP e sicuramente sempre in modo MOLTO piú efficente.
Ma a quasi 40 anni dalla loro prima introduzione il loro utilizzo rimane confinato ad un ambito professionale ed il loro impiego richiede un tempo di apprendimento lungo.
Non esiste un approccio "facile" tipo Arduino per poter utilizzare questi dispositivi, se li si vuole utilizzare si é costretti ad utilizzare programmi di sviluppo molto pesanti, costosi e difficili.
Per programmare una FPGA occorre utilizzare un linguaggio di descrizione per l'hardware come il Verilog o VHDL e solo parzialmente si usa lo schematico (poco utilizzato).
I tempi di compilazione (ed i vari passaggi) sono lunghi rispetto ad una compilazione per Arduino o Visual Studio e la successiva programmazione della FPGA peggiora ulteriormente i tempi di realizzo del progetto.
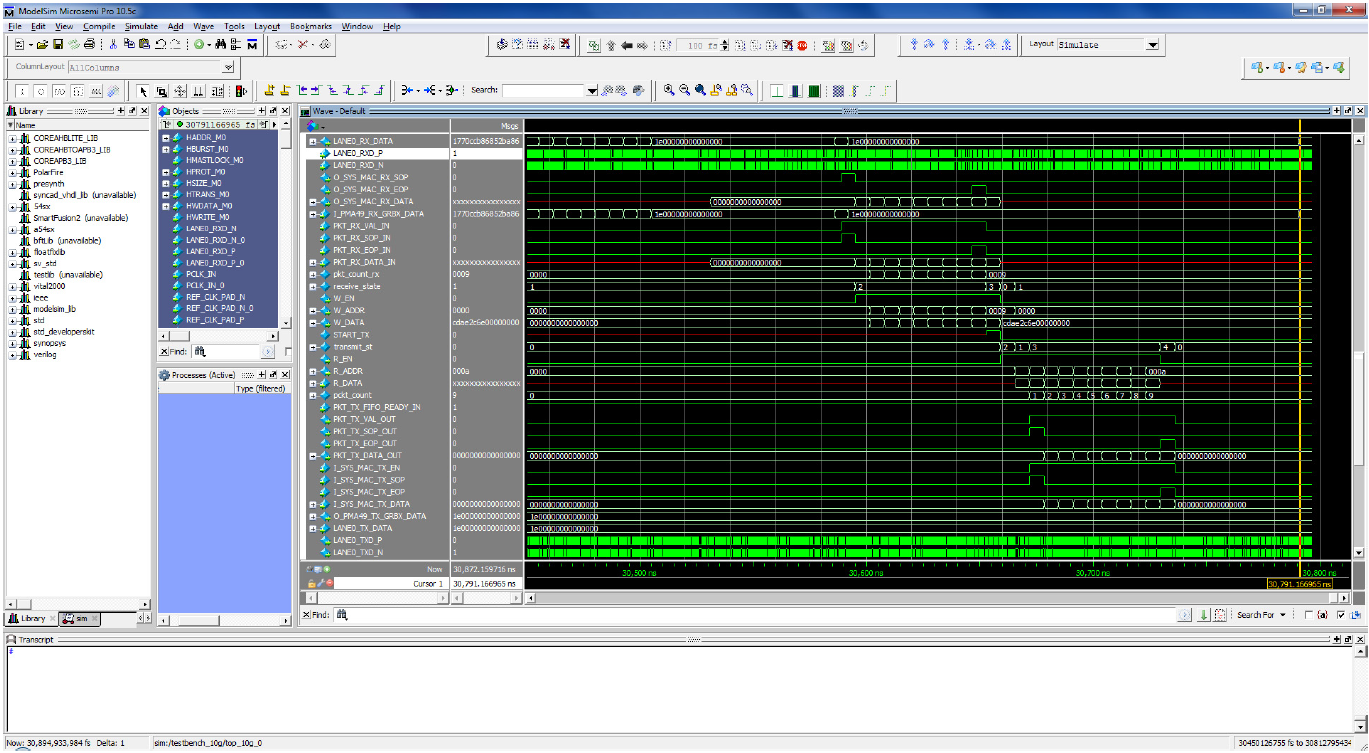
Non a caso all'interno del IDE é presente anche un simulatore per cercare di prevedere se il ns. circuito funzionerá o meno e cercare di accorciare i tempi di messa a punto.
Conoscere il simulatore e creare gli stimoli necessari alla simulazione é altro tempo che occorre ...
Dall'altro lato peró questi dispositivi Vi permettono funzioni inarrivabili in altro modo ed é possibile creare un circuito integrato secondo le Vs. esigenze.
Ma a quasi 40 anni dalla loro prima introduzione il loro utilizzo rimane confinato ad un ambito professionale ed il loro impiego richiede un tempo di apprendimento lungo.
Non esiste un approccio "facile" tipo Arduino per poter utilizzare questi dispositivi, se li si vuole utilizzare si é costretti ad utilizzare programmi di sviluppo molto pesanti, costosi e difficili.
Per programmare una FPGA occorre utilizzare un linguaggio di descrizione per l'hardware come il Verilog o VHDL e solo parzialmente si usa lo schematico (poco utilizzato).
I tempi di compilazione (ed i vari passaggi) sono lunghi rispetto ad una compilazione per Arduino o Visual Studio e la successiva programmazione della FPGA peggiora ulteriormente i tempi di realizzo del progetto.
Non a caso all'interno del IDE é presente anche un simulatore per cercare di prevedere se il ns. circuito funzionerá o meno e cercare di accorciare i tempi di messa a punto.
Conoscere il simulatore e creare gli stimoli necessari alla simulazione é altro tempo che occorre ...
Dall'altro lato peró questi dispositivi Vi permettono funzioni inarrivabili in altro modo ed é possibile creare un circuito integrato secondo le Vs. esigenze.
Sono convinto che la miglior spinta allo studio di una nuova impegnativa tecnologia sia quello di seguire un iniziale percorso "facile" che ci gratifichi con una serie di piccoli successi, un pó come "Hello world" in C, ma poi ci dia lo slancio per avventurarsi sulla vetta.
Per tentare un approccio "facile" ho scelto di non utilizzare Verilog o VHDL per la descrizione dell'hardware ma utilizzare il classico schematico che impiega dispositivi logici di base o piú complessi creati con un apposita funzione.
Per tentare un approccio "facile" ho scelto di non utilizzare Verilog o VHDL per la descrizione dell'hardware ma utilizzare il classico schematico che impiega dispositivi logici di base o piú complessi creati con un apposita funzione.
Questa mia scelta é una visone un pó antiquata ed é legata all'esperienza personale (ho iniziato con le valvole!) che un circuito é descritto da uno SCHEMATICO. Va peró sottolineato che Verilog e VHDL sono sicuramente l'approccio migliore e piú potente, se il progetto non é molto complesso uno schematico puó anche essere piú intellegibile di un programma Verilog o VHDL ma all'aumentare della complessitá uno schematico puó diventare assai difficile da "leggere", anche se un approccio gerarchico aiuta ...
A tutto oggi rimane una delle poche aziende che produce piccoli tagli con pochi gates e contenitori facilmente utilizzabili mentre i detentori del mercato si spostano sempre piú su prodotti molto potenti ma costosi e difficili da impiegare.
L'FPGA utilizzata é la A3P125 montata su una piccola scheda chiamata CUBE-3D completamente open source ed anche acquistabile on line.
L'impegno richiesto é quello di prendere conoscenza della logica interna di base disponibile ed imparare ad utilizzare ViewDraw (assai facile) che é il programma utilizzato per immettere gli schematici.
Il tutto peró sará facilitato da diversi video e da molti semplici progetti pronti e testati da poter subito impiegare o da modificare a proprio piacimento.
Il tutto peró sará facilitato da diversi video e da molti semplici progetti pronti e testati da poter subito impiegare o da modificare a proprio piacimento.
Adesso peró per poter continuare Vi occorre quanto segue:

PROGRAMMING AN FPGA WITHOUT KNOWING VERILOG or VHDL
The FPGA (Field Programmable Gate Array) is a programmable integrated circuit that offers solutions not possible with microcontrollers or DSPs and certainly always VERY more efficiently.
But almost 40 years after their first introduction, their use remains confined to a professional environment and their use requires a long learning time.
There is no "easy" Arduino type approach to use these devices, if you want to use them you are forced to use very heavy, expensive and difficult development programs.
The compilation times (and the various steps) are long compared to a compilation for Arduino or Visual Studio and the subsequent programming of the FPGA further worsens the project realization times.
Knowing the simulator and creating the necessary stimuli for the simulation is another time that it takes ...
On the other hand, however, these devices allow functions that cannot be reached in any other way and it is possible to create an integrated circuit according to your needs.
I am convinced that the best push to study a new challenging technology is to follow an initial "easy" path that gratifies us with a series of small successes, a bit like "Hello world" in C, but then gives us the impetus for venture onto the summit.
To attempt an "easy" approach I chose not to use Verilog or VHDL for the description of the hardware but to use the classic schematic that uses basic or more complex logical devices created with a special function.
My choice is a vision a little bit old-fashioned and is linked to the personal experience (I started with the tubes!) that a circuit is described by one SCHEMATIC. It should be stressed that Verilog and VHDL are definitely the best and most powerful approach. If the project is not very complex a schematic one can be more intelligible than a Verilog or VHDL program but with increasing complexity a schematic can become very difficult to "read", even if a hierarchical approach helps ...
For strictly personal reasons (I have been using them for twenty years) I use of FPGAs by Microsemi (Ex Actel now Microchip) are not among the most widespread devices on the market (dominated by Altera and Xilinx) but I made this choice for some of their features such as use of FLASH technology, for the great variety of cuts (from a few Kgates to several Mgates) and for the possibility of being able to use a wide range of packages.
Today, it remains one of the few companies that produces small cuts with few gates and packages that can be easily used, while market holders are increasingly moving to very powerful products that are expensive and difficult to use.
The commitment required is to get to know the basic internal logic available and learn to use ViewDraw (very easy) which is the program used to enter the schematics.
All this will be facilitated by several videos and by many simple projects ready and tested to be able to be immediately used or modified as desired.
Now in order to continue, you need the following:
VIDEO TUTORIALS
These videos are based on one of the available projects. To do the tests, open a desired project and use the SaveAs function from the File menu of Libero IDE. The whole project will be copied and we will be able to modify it at will.
RICHIEDERE UNA LICENZA
Per richiedere una licenza SILVER occorre visitare il sito MICROSEMI a questo indirizzo, creare un account e richiedere la licenza.
Essendo la licenza NODE LOCKED occorre specificare l'identificatore del Vs. hard disk di sistema.
Essendo la licenza NODE LOCKED occorre specificare l'identificatore del Vs. hard disk di sistema.
Per questo occorre utilizzare dalla linea di comando il comando VOL e memorizzarsi le otto cifre esadecimali dell'ID.
Una volta che riceverete via email il file di licensa occorre caricarlo nella directory C:\FLEXLM da creare se non esiste.
La licensa é valida per un anno, poi va nuovamente richiesta.
Una volta che riceverete via email il file di licensa occorre caricarlo nella directory C:\FLEXLM da creare se non esiste.
La licensa é valida per un anno, poi va nuovamente richiesta.
REQUEST A LICENSE
To request a SILVER license you must visit the MICROSEMI website at this address, create an account and request a license.
Since this license is NODE LOCKED and you must specify the identifier of your system hard disk.
To do this, use the VOL command from the command line and save the eight hexadecimal digits of the ID.
Once you receive the license file by email, you need to upload it to the C:\FLEXLM directory to be created if it does not exist.
The license is valid for one year, then it must be requested again.
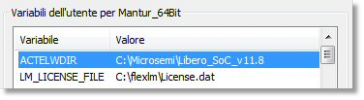
CREARE LE VARIABILI DI SISTEMA
Occorre creare le seguenti variabili di sistema in accordo a quanto installato.
CREATE SYSTEM VARIABLES
The following system variables must be created according to what is installed.
BOARD CON FPGA A3P125
Sul mercato si trovano molte schede di sviluppo basate su FPGA, per questo tutorial e per tutti i progetti presenti io faccio riferimento alla scheda CUBE-3D che é un progetto Open Source ma che é possibile acquistare online.
BOARD WITH FPGA A3P125
On the market there are many development boards based on FPGA, for this tutorial and for all the present projects I refer to the CUBE-3D board which is an Open Source project but which can be purchased online.
PROGRAMMATORE FPGA
Per programmare l'FPGA occorre un specifico dispositivo:
FPGA PROGRAMMER
To program the FPGA you need a specific device:

Questo lo si puó acquistare in rete presso:
This can be purchased online at:
NOTE SUI PROGETTI
Molti dei progetti sotto elencati vengono testati utilizzando un Arduino Due con la scheda CUBE-3D connessa sul connettore X10.
Sotto trovate l'intero progetto della FPGA e il relativo file .INO di test.
Sotto trovate l'intero progetto della FPGA e il relativo file .INO di test.
La scheda CUBE-3D monta il connettore ESQ-110-14-L-D della Samtec che permette il montaggio impilato.
PROJECTS NOTES
Many of the projects listed below are tested using an Arduino Due with the CUBE-3D board connected to X10 connector.
Below you will find the entire FPGA project and the related .INO test file.
The CUBE-3D board features the Samtec ESQ-110-14-L-D connector which allows stacked mounting.
PROJECTS
DESCRIPTION | TEST PROGRAM | DOCS | USED GATES | REVISION | DIFFICULTY |
| Output ports on 8 bit bus | cube_1.ino | 1.6% | 1.0 2019/10/15 |  | |
| Input/Output ports on 8 bit bus | cube_2.ino | 2% | 1.0 2019/10/15 | |
A special thanks goes to La TecniKaDue for materials, assistance provided and patience!